Simplifying Security: A Beginner's Guide to Using a Password Manager

In today's digital age, where we juggle multiple online accounts across various platforms, ensuring the security of our passwords has become more critical than ever. Yet, the complexity of creating and managing unique passwords for each account can be overwhelming. This is where password managers come to the rescue.


What is a Password Manager?

A password manager is a software application designed to securely store and manage passwords for various online accounts. It acts as a digital vault, encrypting your passwords and providing easy access to them whenever needed.


Why Use a Password Manager?

1. Enhanced Security: Password managers generate strong, unique passwords for each of your accounts, reducing the risk of unauthorized access due to password reuse or weak passwords.

2. Convenience: With a password manager, you only need to remember one master password to access all your stored passwords, making it easier to manage multiple accounts.

3. Cross-Platform Syncing: Many password managers offer synchronization across different devices and platforms, ensuring your passwords are accessible wherever you go.

4. Encrypted Storage: Password managers use advanced encryption algorithms to safeguard your password data, protecting it from unauthorized access.


How to Get Started with a Password Manager:

1. Choose a Password Manager: There are several password managers available, including LastPass, Dashlane, and Bitwarden. Research and select one that meets your security requirements and preferences.

2. Create a Master Password: Your master password is the key to unlocking your password manager vault. Choose a strong, memorable passphrase that is unique and not easily guessable.

3. Install the Password Manager: Download and install the chosen password manager on your device(s) and follow the setup instructions to create your account.

4. Add Your Accounts: Once set up, start adding your online accounts to the password manager. You can manually enter each account's login credentials or import them from your browser.

5. Generate Strong Passwords: When creating new accounts or updating existing passwords, use the password manager's built-in password generator to create strong, random passwords.

6. Organize and Secure Your Vault: Organize your passwords into categories or folders within the password manager for easier access. Ensure that your master password is strong and known only to you.


Best Practices for Using a Password Manager:

- Regularly update your master password and ensure it is unique and not used elsewhere.

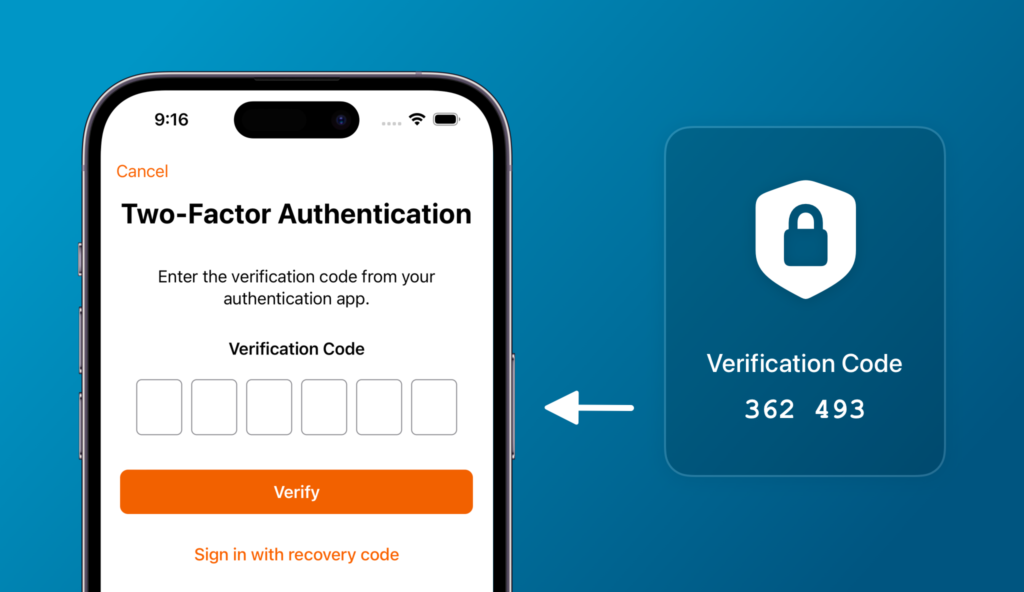
- Enable two-factor authentication (2FA) for an additional layer of security.

- Periodically review and update your stored passwords, especially for critical accounts.

- Be cautious when accessing your password manager on shared or public devices, and always log out when done.


By adopting a password manager, you can simplify password management while enhancing your online security. Invest some time upfront to set it up correctly, and enjoy the peace of mind knowing that your accounts are better protected.

Mastering Cloud Storage: A Guide to Using Dropbox, Google Drive, and More Effectively

In today's digital age, cloud storage has become an indispensable tool for individuals and businesses alike. Services like Dropbox, Google Drive, and others offer convenient ways to store, access, and share files from anywhere with an internet connection. However, many users may not be utilizing these platforms to their full potential. In this guide, we'll explore how to make the most out of cloud storage services for your personal and professional needs.


Understanding Cloud Storage


Cloud storage allows you to store your files securely on remote servers, accessible via the internet. This eliminates the need for physical storage devices and provides the flexibility to access your files from multiple devices.


 Choosing the Right Cloud Storage Service


Before diving in, it's essential to choose a cloud storage service that suits your requirements. Here's a brief overview of two popular options:


 Dropbox:

- Known for its user-friendly interface and seamless file syncing across devices.

- Offers a free basic plan with limited storage and paid plans for additional space and features.


 Google Drive:

- Integrated with Google Workspace (formerly G Suite), providing collaborative features like real-time editing and commenting on documents.

- Comes with a generous amount of free storage and options to upgrade for more space.


 Getting Started with Cloud Storage


1. Sign Up: Create an account with your chosen cloud storage provider.


2. Install the App: Download and install the desktop and mobile apps for easy access to your files.


3. Upload Files: Start by uploading your files to the cloud storage platform. You can drag and drop files directly into the web interface or use the desktop app to sync files from your computer.


 Organizing Your Files


Effective file organization is key to maximizing productivity and efficiency. Here are some tips:


- Create Folders: Organize your files into folders based on categories or projects.

- Use Tags and Labels: Assign tags or labels to files for easier searching and sorting.

- Share Folders: Collaborate with others by sharing entire folders, allowing multiple users to access and edit files.


 Collaborating with Others


One of the biggest advantages of cloud storage is its collaborative features. Here's how to make the most of them:


- Real-Time Editing: Work on documents simultaneously with others, seeing changes in real-time.

- Commenting and Feedback: Leave comments on files to provide feedback or ask questions.

- Version History: Access previous versions of files and revert to earlier edits if needed.


 Security and Privacy


While cloud storage offers convenience, it's essential to prioritize security and privacy. Here are some best practices:


- Enable Two-Factor Authentication: Add an extra layer of security to your account.

- Encrypt Sensitive Files: Use encryption tools to protect sensitive data before uploading it to the cloud.

- Review Sharing Settings: Regularly review and update sharing settings to control who has access to your files.


 Conclusion


Cloud storage services like Dropbox and Google Drive offer powerful tools for storing, organizing, and sharing your files. By following the tips and best practices outlined in this guide, you can make the most out of these platforms and streamline your digital workflow.

In this format, the content is structured as a comprehensive guide, providing an overview, step-by-step instructions, tips, and best practices for effectively using cloud storage services.

Personalize Your Desktop: A Guide to Customizing Themes and Icons

Introduction

Your desktop is the digital space where you spend a significant amount of time each day. Making it visually appealing and organized can enhance your productivity and overall computing experience. In this guide, we'll explore how to personalize your desktop by customizing themes and icons, allowing you to create a workspace that reflects your personality and preferences.


Step 1: Choosing a Theme

The first step in customizing your desktop is selecting a theme that suits your style. Here's how to do it:

1. Right-click on an empty area of your desktop and select "Personalize" from the dropdown menu.

2. In the Personalization settings window, navigate to the "Themes" tab.

3. Browse through the available themes or click on "Get more themes online" to explore additional options.

4. Once you've found a theme you like, click on it to apply it to your desktop.


Step 2: Customizing Theme Settings

After applying a theme, you can further customize its settings to match your preferences:

1. Return to the Personalization settings window and click on the "Theme settings" link under the selected theme.

2. Here, you can adjust various aspects of the theme, such as the background image, color scheme, sounds, and mouse pointers.

3. Experiment with different settings until you achieve the desired look and feel for your desktop.


Step 3: Changing Desktop Icons

Next, let's spruce up your desktop by changing the default icons for your files, folders, and shortcuts:

1. Right-click on the desktop and select "Personalize" once again.

2. This time, choose the "Change desktop icons" option from the left sidebar.

3. In the Desktop Icon Settings window, you'll see a list of default icons such as Computer, Network, and Recycle Bin.

4. To change an icon, select it from the list and click on the "Change Icon" button.

5. Browse through the available icon options or click "Browse" to select an icon file from your computer.

6. Once you've chosen a new icon, click "OK" to apply the changes.

7. Repeat this process for each icon you wish to customize.


Step 4: Organizing Your Desktop

With your new theme and customized icons in place, it's time to organize your desktop for maximum efficiency:

1. Arrange your icons in a way that makes sense to you, whether it's by category, frequency of use, or another system.

2. Consider creating folders to group related files and shortcuts together, keeping your desktop clutter-free.

3. Take advantage of features like desktop shortcuts and pinned items to quickly access frequently used programs and files.


Conclusion:

By following these steps, you can transform your desktop into a personalized workspace that reflects your unique style and enhances your computing experience. Experiment with different themes, icons, and organizational strategies until you find the perfect setup that suits your needs. With a bit of creativity and customization, your desktop can become not only a functional tool but also a source of inspiration and motivation.

How to Recover Deleted Files on Windows/MacOS

Have you ever accidentally deleted an important file and thought it was gone forever? Don't panic just yet! In this guide, we'll show you how to recover deleted files on both Windows and MacOS systems. Whether it's a crucial document, a cherished photo, or an essential project file, there's hope for retrieving it. Let's dive in!


For Windows:


1. Check the Recycle Bin: The first place to look for deleted files on Windows is the Recycle Bin. Double-click on the Recycle Bin icon on your desktop to open it. If you find the deleted file here, simply right-click on it and select "Restore" to return it to its original location.


2. Use File History (Windows 10/11): If you've enabled File History on your Windows 10 or 11 system, you can recover previous versions of files. Search for "File History" in the Start menu, then select "Restore your files with File History" and follow the prompts to locate and recover your deleted files.


3. Try Data Recovery Software: If the above methods don't work, consider using third-party data recovery software like Recuva, EaseUS Data Recovery Wizard, or Stellar Data Recovery. Install the software, scan your hard drive for deleted files, and follow the on-screen instructions to recover them.


For MacOS:


1. Check the Trash: Similar to the Recycle Bin on Windows, MacOS has a Trash folder where deleted files are temporarily stored. Click on the Trash icon in the Dock to open it. If you find your deleted file here, drag it back to the desktop or the desired location to restore it.


2. Use Time Machine: If you've set up Time Machine for backups on your MacOS system, recovering deleted files is a breeze. Launch Time Machine by clicking on its icon in the menu bar or searching for it in Spotlight. Navigate to the date when the file was still available, select it, and click "Restore" to bring it back.


3. Employ Data Recovery Software: In case your deleted file isn't in the Trash or covered by Time Machine, you can turn to data recovery software like Disk Drill, Data Rescue, or TestDisk. Download and install the software, scan your hard drive for deleted files, and follow the instructions to recover them.


Remember, the key to successful file recovery is acting quickly. Avoid saving new files or installing new software on the affected drive to prevent overwriting the deleted data. With these methods at your disposal, you can often retrieve your precious files and breathe a sigh of relief.

How to Back Up and Transfer Data from Your Smartphone to Your Computer

In an era where our smartphones are extensions of our personal and professional lives, safeguarding the plethora of information they hold is paramount. Whether you're transitioning to a new device, looking to free up space, or simply aiming to secure your data against unforeseen events, understanding how to efficiently back up and transfer data from your smartphone to your computer is essential. This comprehensive guide will walk you through the steps to accomplish this task seamlessly, regardless of whether you use an Android or iOS device.


For Android Users


Step 1: Choose Your Method


For Android users, several methods are available for backing up and transferring data, including using Google's backup services, third-party apps, or manually transferring files. One straightforward method is to utilize Google Drive.


Step 2: Using Google Drive


1. Google Backup: Ensure your Google account is linked to your phone. Navigate to 'Settings' > 'System' > 'Backup', and turn on 'Back up to Google Drive'. This step ensures your app data, Wi-Fi passwords, and various settings are safely stored in the cloud.


2. Manual Backup: For photos and videos, Google Photos offers a simple solution. Install the app if it isn't already on your device, and enable 'Backup & Sync' within its settings. This will automatically upload your media to the cloud, accessible from any device with internet access.


Step 3: Transfer to Computer


To transfer these files to your computer:

- Visit [drive.google.com](https://drive.google.com) or [photos.google.com](https://photos.google.com) on your browser.

- Sign in with the same Google account used on your smartphone.

- You can now download your data directly to your computer for local storage.


Manual Transfer via USB


For a direct transfer without the cloud:

- Connect your Android device to your computer using a USB cable.

- On your phone, tap the notification that says "Charging this device via USB".

- Select 'File Transfer' under 'Use USB for'.

- Your phone will appear as a drive on your computer. Simply drag and drop files from your phone to your desired location on your computer.


For iOS Users


Step 1: Choose Your Backup Method


iOS users can back up their data using iCloud or iTunes/Finder.


Step 2: Using iCloud


1. Enable iCloud Backup: Go to 'Settings' > [Your Name] > 'iCloud' > 'iCloud Backup'. Ensure 'iCloud Backup' is toggled on. Your device will automatically back up data whenever it's connected to Wi-Fi and plugged into a charging source.


2. Manual Backup: You can also manually initiate a backup by tapping 'Back Up Now' in the same menu.


Step 3: Transfer to Computer


To access your iCloud data on a computer:

- Navigate to [icloud.com](https://www.icloud.com/) and log in with your Apple ID.

- You can view and download your photos, documents, and more to your computer.


Using iTunes/Finder


1. Connect Your Device: Plug your iPhone into your computer and open iTunes (on Windows or macOS Mojave and earlier) or Finder (on macOS Catalina and later).

2. Back Up Your Device: In iTunes, click on the device icon and select 'Back Up Now'. In Finder, select your device under 'Locations' and click 'Back Up Now'.

3. Transfer Files: You can also use iTunes/Finder to manage and transfer specific files like music, videos, and photos between your device and computer.


Conclusion


Regularly backing up and transferring data from your smartphone to your computer not only secures your valuable information but also provides peace of mind. Whether you're an Android or iOS user, the process can be straightforward and significantly mitigates the risk of data loss. Remember to perform backups regularly and before making any major changes to your device or its software.

How to Protect Yourself from Phishing Scams: Recognizing and Avoiding Them

In the digital age, staying safe online is more crucial than ever. Phishing scams are among the most common and effective methods used by cybercriminals to steal sensitive information, such as passwords, credit card numbers, and personal data. Fortunately, with awareness and vigilance, you can protect yourself from falling victim to these scams. In this guide, we'll explore how to recognize phishing attempts and avoid them effectively.


What is Phishing?


Phishing is a type of cyber attack where fraudsters impersonate legitimate organizations or individuals to trick users into providing confidential information or downloading malicious software. These scams often occur via email, text messages, or fake websites designed to look like reputable sources.


How to Recognize Phishing Attempts:


1. Check the Sender's Email Address: Be wary of emails from unfamiliar or suspicious addresses. Pay close attention to misspellings or subtle variations in domain names that may indicate a fraudulent sender.


2. Look for Urgency or Alarmist Language: Phishing emails often use urgent language or threats to pressure recipients into taking immediate action. Beware of messages claiming that your account will be suspended unless you provide information promptly.


3. Verify Requests for Personal Information: Legitimate organizations typically won't ask you to provide sensitive information such as passwords or credit card numbers via email. If in doubt, contact the company directly through official channels to confirm the request's authenticity.


4. Inspect Links and URLs: Hover your mouse over hyperlinks in emails to reveal the destination URL. Be cautious of links that redirect to unfamiliar or suspicious websites, especially those with slight variations in spelling or domain names.


5. Watch for Generic Greetings: Phishing emails often use generic greetings like "Dear Customer" instead of addressing recipients by name. Legitimate communications from reputable companies are more likely to use personalized salutations.


6. Be Skeptical of Attachments: Avoid opening email attachments from unknown senders, as they may contain malware or viruses. Even attachments from seemingly trusted sources should be treated with caution if unexpected or unusual.


How to Avoid Falling Victim to Phishing Scams:


1. Educate Yourself and Others: Stay informed about the latest phishing tactics and share this knowledge with friends, family, and colleagues. Awareness is key to preventing successful phishing attacks.


2. Use Multi-Factor Authentication (MFA): Enable MFA whenever possible to add an extra layer of security to your accounts. This requires additional verification beyond just a password, making it harder for attackers to gain unauthorized access.


3. Install Security Software: Use reputable antivirus and anti-phishing software to help detect and block malicious threats. Keep your security software up to date to ensure optimal protection against evolving cyber threats.


4. Keep Software and Systems Updated: Regularly update your operating system, web browsers, and applications to patch security vulnerabilities. Hackers often exploit outdated software to launch phishing attacks and infiltrate systems.


5. Trust Your Instincts: If something seems suspicious or too good to be true, it probably is. Trust your instincts and err on the side of caution when interacting with unfamiliar or unsolicited messages, links, or attachments.


By staying vigilant and following these best practices, you can significantly reduce your risk of falling victim to phishing scams. Remember to remain cautious and skeptical of unsolicited communications, and always verify the authenticity of requests for personal or sensitive information. With awareness and proactive security measures, you can safeguard your online accounts and protect yourself from cyber threats. Stay safe online!

How to Safely Shop Online: Tips for Secure E-commerce Transactions

In today's digital age, online shopping has become increasingly popular for its convenience and accessibility. However, with the rise of cyber threats and online scams, it's essential to prioritize security when making e-commerce transactions. Whether you're buying clothes, gadgets, or groceries online, following these tips can help you shop safely and protect your sensitive information.


1. Shop from Secure Websites:

 Before making a purchase, ensure that you're on a secure website. Look for "https://" in the URL and a padlock symbol in the address bar, indicating that the site is encrypted and secure.


2. **Use Trusted Retailers**: 

Stick to reputable online retailers and avoid unfamiliar websites that may not have robust security measures in place. Check reviews and ratings from other customers to gauge the reliability of the seller.


3. Update Your Device and Software: 

Keep your computer, smartphone, and browser up to date with the latest security patches and updates. Outdated software may have vulnerabilities that hackers can exploit.


4. **Beware of Phishing Emails**: 

Be cautious of emails claiming to be from retailers asking for your personal or financial information. Legitimate companies will not ask for sensitive details via email. Avoid clicking on links or downloading attachments from suspicious emails.


5. Use Strong Passwords: 

Create strong, unique passwords for your online accounts and avoid using the same password across multiple sites. Include a mix of letters, numbers, and special characters to make your passwords more secure.


6. Enable Two-Factor Authentication: 

Many e-commerce platforms offer two-factor authentication (2FA) as an extra layer of security. Enable 2FA wherever possible to add an additional barrier against unauthorized access to your accounts.


7. Monitor Your Accounts Regularly: 

Keep a close eye on your bank and credit card statements for any unauthorized transactions. Report any suspicious activity to your financial institution immediately.


8. Be Wary of Public Wi-Fi: 

Avoid making online purchases when connected to public Wi-Fi networks, as they may not be secure. Use a virtual private network (VPN) to encrypt your internet connection and protect your data while shopping on public networks.


9. Check for Secure Payment Options: 

Look for secure payment options such as credit cards, PayPal, or digital wallets like Apple Pay or Google Pay. These methods offer added layers of security and may provide buyer protection in case of fraudulent transactions.


10. Review Privacy Policies: 

Take the time to read the privacy policies of online retailers to understand how your personal information will be handled. Avoid sharing unnecessary details and opt-out of marketing communications if you prefer not to receive them.


By following these tips, you can shop online with confidence, knowing that you're taking proactive steps to safeguard your sensitive information and protect yourself from online threats. Stay vigilant and prioritize security whenever you make e-commerce transactions to ensure a safe and enjoyable shopping experience.

How to Spot and Remove Malware from Your Computer

Introduction:
Malware, short for malicious software, is a persistent threat in today's digital landscape. Whether you're browsing the web, downloading files, or opening email attachments, your computer is vulnerable to malware infections. In this guide, we'll discuss how to spot the signs of malware on your computer and provide step-by-step instructions on how to remove it effectively.
 

Signs of Malware Infection:

Before diving into the removal process, it's essential to recognize the signs of a malware infection. Here are some common indicators that your computer may be compromised:


Slow Performance: 

Noticeable slowdown in computer performance, including longer boot times and sluggish response to commands.

Pop-up Ads: 

Persistent pop-up ads appearing on your screen, even when you're not browsing the internet.
Unexplained Behavior: Strange behavior such as unexpected crashes, programs opening or closing on their own, or changes to system settings.


High Network Activity: 

Unexplained spikes in network activity or data usage, indicating that malware may be communicating with remote servers.

Security Warnings: 


Antivirus software or your operating system may display warnings about detected malware or suspicious activities.

Steps to Remove Malware:

If you suspect that your computer is infected with malware, follow these steps to remove it:

Disconnect from the Internet: 

Start by disconnecting your computer from the internet to prevent the malware from communicating with its command-and-control servers.

Enter Safe Mode:


Boot your computer into Safe Mode to limit the malware's ability to operate. To do this, restart your computer and repeatedly press the F8 key until the Advanced Boot Options menu appears. Select "Safe Mode" from the list and press Enter.

Run Antivirus Scan: 

Use your installed antivirus software to perform a full system scan. Update the antivirus definitions if necessary and let the scan run until it completes. Follow any prompts to quarantine or remove detected malware.

Use Malware Removal Tools:

 If your antivirus software doesn't fully remove the malware, consider using specialized malware removal tools such as Malwarebytes or Spybot Search & Destroy. Download the tools from a reputable source, install them, and run a scan to detect and remove the remaining threats.

Manually Remove Malicious Programs: 

In some cases, you may need to manually remove malicious programs or files. Open the Control Panel and navigate to "Programs and Features" (or "Add or Remove Programs" on older Windows versions) to uninstall any suspicious programs. Additionally, delete any unknown or suspicious files from your computer's directories.

Reset Browser Settings: 

Malware often affects web browsers, so it's essential to reset your browser settings to their default configurations. Open your browser's settings menu, locate the option to reset settings, and confirm the action.

Update System and Software: 

After removing malware, ensure that your operating system and installed software are up to date with the latest security patches and updates. Regular updates help protect your computer from future threats.

Conclusion:

Malware infections can compromise your computer's security and privacy, but with the right tools and knowledge, you can effectively remove them. By following the steps outlined in this guide and practicing safe computing habits, you can keep your computer protected against malware threats. Stay vigilant, keep your antivirus software updated, and remain cautious when browsing the web or downloading files to minimize the risk of malware infections.


How to Optimize Your Browser for Better Performance and Security

A sluggish or insecure web browser can significantly hamper your online experience. Optimizing your browser not only enhances its performance but also bolsters your online security. Here's how to get started:


Step 1: Clear Your Browser Cache and Cookies

Over time, your browser accumulates cached files and cookies, which can slow it down. Regularly clearing these can speed up your browsing experience. Access your browser's settings to find the option to clear your browsing data.


Step 2: Update Your Browser

Running the latest version of your browser ensures you have the most recent performance improvements and security patches. Enable automatic updates if available.


Step 3: Manage Your Extensions and Plugins

Extensions and plugins can offer useful features, but having too many can slow down your browser. Review your installed extensions and remove any that you no longer use or need.


Step 4: Enable Pop-Up Blocker and Unwanted Ads

Most browsers have built-in features to block pop-ups and unwanted ads that can detract from your browsing experience. Enable these features in your browser's settings.


Step 5: Use a Reliable Security Extension

Consider adding an extension that enhances your online security, such as an ad blocker or a security tool that warns you about malicious websites.


Step 6: Optimize Browser Settings for Privacy

Review your browser's privacy settings to control tracking and data collection. Options like 'Do Not Track' and disabling third-party cookies can enhance your privacy.


Step 7: Regularly Review Permissions for Websites

Periodically review the permissions you've granted to websites (like access to your microphone, camera, or location) and revoke any that are unnecessary.


Step 8: Consider a Browser Dedicated to Privacy

For those particularly concerned with privacy, consider using a browser known for its strong privacy features, such as Firefox or Brave.


Step 9: Implement a Secure Password Management System

Use a built-in or third-party password manager to create and store strong, unique passwords for all your online accounts, enhancing security.


By taking these steps, you can ensure that your browser runs more efficiently and offers a safer and more secure online experience. Regularly revisiting these tips will help maintain optimal performance and security over time.

How to Clean Up Your Digital Workspace: Organizing Files and Folders

In today's digital age, organizing your virtual desktop can be just as crucial as organizing your physical workspace. A cluttered digital environment can hinder your productivity and even slow down your computer. Here's a step-by-step guide on how to clean up your digital workspace, focusing on organizing files and folders effectively.


Step 1: Delete Unnecessary Files

Begin by going through your files and deleting anything you no longer need. This could include old documents, duplicate files, or downloads you no longer have use for. Be thorough, but careful not to delete anything important.


Step 2: Create a Logical Folder Structure

Develop a folder structure that makes sense for your work or personal life. For instance, you might have main folders for "Work," "Personal," and "Projects," with subfolders within each category for more specific organization.


Step 3: Organize Existing Files

Once you have your folder structure, start moving your existing files into the appropriate folders. It can be helpful to do this in stages, focusing on one main folder at a time.


Step 4: Clean Up Your Desktop

Your desktop should be a space for items you need immediate access to. Try to limit the number of files and shortcuts on your desktop. Consider creating a "Temporary" folder on your desktop for files you need to access quickly but plan to move later.


Step 5: Utilize Cloud Storage

For files you don't need daily access to but want to keep, consider using cloud storage services like Google Drive, Dropbox, or OneDrive. This can also be an excellent way to back up important files.


Step 6: Implement a Naming Convention

Develop a consistent naming convention for your files and folders. This might include including dates, project names, or version numbers in file names to make them easier to search for and organize.


Step 7: Regular Maintenance

Finally, set a regular schedule to clean up your digital workspace. Once a month is a good practice for most people, ensuring that your digital environment remains organized and efficient.


By following these steps, you can create a more organized, productive digital workspace that mirrors the functionality and efficiency of a well-organized physical workspace.

How to Set Up Two-Factor Authentication for Added Security

In the digital age, protecting your online accounts has never been more critical. With cyber threats on the rise, a strong password alone may not suffice. Two-factor authentication (2FA) adds an extra layer of security, ensuring that only you can access your accounts. Here's a step-by-step guide to setting up 2FA for enhanced security.


What is Two-Factor Authentication?


Two-factor authentication is a security process in which users provide two different authentication factors to verify themselves. This method adds an additional layer of security to the authentication process, making it harder for potential intruders to gain access to your online accounts.


Step 1: Choose Your 2FA Method


The first step is to decide which type of 2FA you prefer. The most common methods include:


- Text Message (SMS) Codes: Receive a code via SMS that you enter during login.

- Authentication Apps: Apps like Google Authenticator or Authy generate codes that refresh every 30 seconds.

- Hardware Tokens: Physical devices that generate codes or use a fingerprint to authenticate.


Step 2: Enable 2FA on Your Accounts


Most online services now offer 2FA. To enable it, go to the security settings of your account. Here's how to do it on a few popular platforms:


- Google:

  1. Go to your Google Account.

  2. Click on "Security" on the left navigation panel.

  3. Under "Signing in to Google," select "2-Step Verification."

  4. Click on "Get started" and follow the prompts.


- Facebook:

  1. Go to your Security and Login Settings.

  2. Scroll down to "Use two-factor authentication" and click "Edit."

  3. Choose the authentication method you want to add and follow the on-screen instructions.


Repeat similar steps for other services like Twitter, Instagram, and your banking websites.


Step 3: Set Up Your Authentication Method


If you choose an authentication app:

  1. Download the app from your phone's app store.

  2. In your account's 2FA settings, choose the option to set up an authentication app.

  3. Scan the QR code displayed by the service using your app.

  4. Enter the code provided by the app to verify the setup.


For SMS codes, simply enter your phone number and verify it with the code sent to you.


Step 4: Backup Your Access


Always create backup access methods in case you lose your phone or cannot receive codes. This could be backup codes, a secondary phone number, or even backup hardware tokens.


Why Is 2FA Important?


Two-factor authentication significantly increases your accounts' security by adding a second verification step. Even if a hacker obtains your password, they won't be able to access your account without the second factor.


Conclusion


In today's digital world, taking extra steps to secure your online presence is essential. Setting up two-factor authentication is a simple, effective way to protect your accounts from unauthorized access. Take some time today to secure your digital life by enabling 2FA on all your online accounts.

How to Install and Configure a VPN on Your Devices

In today's digital age, protecting your online privacy is more important than ever. One of the most effective tools for safeguarding your internet connection is a Virtual Private Network, or VPN. A VPN encrypts your internet traffic and disguises your online identity, making it more difficult for third parties to track your activities or steal data. In this tutorial, we'll guide you through the process of choosing, installing, and configuring a VPN on your devices.


Step 1: Choose the Right VPN Service


Before you can install a VPN, you need to choose a service that fits your needs. Consider the following factors:

- Security: Look for VPNs that offer strong encryption methods and a no-logs policy.

- Speed: Ensure the VPN has high-speed servers to avoid slowing down your internet connection.

- Server Locations: The more server locations a VPN has, the better the service in terms of finding a fast and reliable connection.

- Price: Compare pricing plans and decide if you need a free version or if you're willing to pay for premium features.

- Compatibility: Make sure the VPN supports all the devices you want to protect.


Popular VPN services include NordVPN, ExpressVPN, CyberGhost, and Surfshark, among others.


Step 2: Sign Up and Download the VPN App


Once you've chosen a VPN service, sign up on their website. Most services offer various subscription plans. After signing up, download the VPN app for your device. VPN services usually have apps for Windows, MacOS, iOS, Android, and sometimes even extensions for web browsers.


Step 3: Install the VPN App


Open the downloaded file and follow the installation instructions. This process is generally straightforward: agree to the terms of service, select a destination folder, and click 'Install'. Once the installation is complete, launch the application.


Step 4: Log In and Connect to a Server


When you open the app for the first time, you'll need to log in with the account you created. After logging in, you'll see a list of servers or a map showing their locations. To connect, simply click on a server location or use the 'Quick Connect' feature, which selects the best server for you automatically.


Step 5: Configure VPN Settings (Optional)


Most VPN apps are ready to use right after installation, but you might want to tweak some settings for a better experience:

- **Auto-Connect**: Enable this feature to have your VPN automatically connect when you start your device or when it detects an unsecured Wi-Fi network.

- **Kill Switch**: This feature blocks internet access if the VPN connection drops, preventing data leaks.

- **Split Tunneling**: This allows you to choose which apps use the VPN and which don’t, useful for accessing local websites or services.


Step 6: Verify the VPN Connection


To ensure your VPN is working correctly, you can visit a site like ipleak.net. This site shows your current IP address and location. If the IP address and location displayed are different from your actual ones, your VPN is working correctly.


Conclusion


Installing and configuring a VPN is a simple yet effective way to enhance your online security and privacy. By following these steps, you can enjoy a safer internet experience across all your devices. Remember, no online security tool is 100% foolproof, but a VPN is a significant step toward protecting your digital life.

How to Create a Strong Password: Best Practices and Tools

In an era where our lives are increasingly online, the importance of securing our digital presence cannot be overstated. One of the first lines of defense against unauthorized access to our personal and professional accounts is a strong password. Unfortunately, the convenience of using simple, easy-to-remember passwords can lead to significant security risks. In this guide, we will explore the best practices for creating strong passwords and introduce some tools that can help you manage them effectively.


Understanding the Importance of Strong Passwords

A strong password acts as a robust barrier preventing hackers from gaining access to your personal information, financial data, and other sensitive content. With cyber threats becoming more sophisticated, it’s crucial to employ passwords that are not only tough to crack but also unique for each account.


Characteristics of a Strong Password


1. Length: Aim for at least 12 characters. Longer passwords are harder for automated tools to crack.

2. Complexity: Use a mix of uppercase and lowercase letters, numbers, and special characters (e.g., @, #, $, %).

3. Unpredictability: Avoid using easily guessable information, such as birthdays, names, or common phrases.

4. Uniqueness: Use a different password for each of your accounts.


Best Practices for Creating Strong Passwords


- Avoid Common Pitfalls: Steer clear of sequences or repeated characters (e.g., 123456, password, qwerty).

- Use a Passphrase: Consider stringing together four or more unrelated words, which creates a long but memorable password.

- Employ Mnemonics: Create an acronym from a memorable sentence, mixing in numbers and symbols for added complexity.

- Consider Double Column Authentication (DCA): For highly sensitive accounts, think about creating two separate and unique passwords that are required to access the account, adding an extra layer of security.


Tools for Managing Your Passwords

Remembering a unique, complex password for each of your accounts can be daunting. This is where password managers come in handy:


- LastPass: Offers a free version and generates, retrieves, and stores complex passwords.

- 1Password: Known for its strong security features and user-friendly interface.

- Dashlane: Provides not only password management but also dark web monitoring and secure file storage.

- Bitwarden: An open-source option for those who prefer transparency and customization.


Additional Tips

- Regularly Update Your Passwords: Change your passwords periodically, especially if you suspect a breach.

- Enable Two-Factor Authentication (2FA): Adding another layer of security can significantly reduce the risk of unauthorized access.

- Be Wary of Phishing Attempts: Never input your password on suspicious sites. Always verify the URL.


Creating and managing strong passwords might seem like a chore, but the security it provides for your digital life is invaluable. By following these best practices and utilizing password management tools, you can significantly reduce your vulnerability to cyber threats. Remember, the time you invest in securing your online presence is a small price to pay for peace of mind in the digital age.

How to Choose the Right Antivirus Software for Your Computer

In the digital age, protecting your computer from malware, viruses, and cyber threats is more important than ever. With countless options available, choosing the right antivirus software can seem daunting. This guide aims to demystify the process, ensuring you select the best antivirus protection for your needs.


Understanding Antivirus Software


Antivirus software is a program designed to detect, prevent, and remove malware and other malicious software from your computer. It's your first line of defense against cyber threats, providing real-time protection and peace of mind.


Key Features to Look For


When selecting antivirus software, consider the following essential features:


1. Real-time Scanning: This feature continuously checks your computer for threats, providing immediate protection from malware.


2. Automatic Updates: Cyber threats evolve rapidly; your antivirus should automatically update to combat the latest malware.


3. System Performance: High-quality antivirus software should protect your computer without significantly slowing it down. Look for solutions that offer efficient protection with minimal impact on system performance.


4. Malware Removal: Ensure the software can not only detect but also remove malware effectively from your computer.


5. User-Friendly Interface: You should easily navigate the software, perform scans, and customize settings without confusion.


6. Support and Customer Service: Reliable customer support is crucial. Look for products with robust support options, including FAQs, forums, live chat, and phone support.


 Free vs. Paid Antivirus Software

While free antivirus software provides basic protection, paid versions offer comprehensive features like internet security, firewall protection, and parental controls. Consider what level of security you need and whether the additional features of paid software justify the cost for your situation.


Research and Reviews

Before making a decision, research and read reviews from reputable sources. Look for comparative analyses and tests that evaluate the effectiveness of antivirus software against known threats. User reviews can also provide insight into real-world performance and potential issues.


 Compatibility with Your Operating System

Ensure the antivirus software you choose is compatible with your operating system, whether you're using Windows, macOS, Linux, or another OS. Some software is specifically optimized for certain platforms, offering better protection and performance.


 Trial Versions

Many antivirus providers offer trial versions of their software. Taking advantage of these trials allows you to evaluate the software's performance on your computer and determine if it meets your needs before making a purchase.


 Making Your Choice

Selecting the right antivirus software comes down to balancing your specific needs with the features and protection offered. Consider the security level you require, the software's impact on system performance, your budget, and user reviews.


By following these guidelines, you can choose antivirus software that provides robust protection, keeping your computer and personal information safe from cyber threats.

How to Backup and Restore Your Computer Files: A Comprehensive Guide

In today's digital age, data is everything. From precious family photos to important work documents, losing these files can be a disaster. That's why backing up and restoring your computer files is a crucial task that everyone should know how to do. In this comprehensive guide, we'll walk you through the steps to ensure your data is safe and sound, no matter what happens.


Why Backup Your Data?


Before diving into the how-tos, let's understand why backing up your data is essential. Data loss can occur due to various reasons—hardware failure, software corruption, virus attacks, accidental deletions, and natural disasters. Backups are your safety net, ensuring that your data is recoverable even when the worst happens.

Choosing Your Backup Solution


There are several ways to back up your computer files, including using external hard drives, cloud storage services, or dedicated backup software. Each method has its pros and cons, and you might even consider using a combination for added security.

-External Hard Drives: 

Affordable and straightforward, allowing for quick restoration. However, they can be lost, stolen, or damaged.

-Cloud Storage Services:

Providers like Google Drive, Dropbox, and OneDrive offer convenient off-site backups. They protect against physical damage but rely on internet connections and subscription fees for larger storage capacities.

- Dedicated Backup Software:

 Automates the backup process, offering features like scheduled backups and incremental updates. They can back up to various locations, including external drives and cloud services.

Step-by-Step Guide to Backing Up Your Data


1. Select Your Backup Medium: 

Choose between an external drive, cloud service, or backup software based on your needs.

2. Organize Your Files:

Before backing up, organize your files. This makes the process smoother and ensures you don't miss anything important.

3. Performing the Backup:

   - **External Drive:**   Connect the drive to your computer. You can manually copy files or use software like Windows Backup and Restore or Time Machine on Mac.

   - **Cloud Storage:**   Choose a provider and upload your files. Many services offer automatic sync options.

   - **Dedicated Software:**   Install your chosen software and follow its setup process to select backup sources, destinations, and schedules.

4. Verify the Backup:

 Ensure your files are correctly backed up by checking the destination folder or accessing your cloud storage via a web browser.

 Restoring Your Data


The restoration process depends on the backup method used:

- External Drive: 

Connect the drive and manually copy files back to your computer or use the restoration feature in your backup software.

- Cloud Storage:

Download the needed files from your cloud account or use the provider's restore function for larger recoveries.

- Dedicated Software:
Use the software's restore function, guiding you to select the backup and files you wish to restore.

Regular Backups and Maintenance

Creating a backup is not a one-time task. Regular backups ensure that your most recent data is always protected. Automate this process if possible, and periodically check your backups to ensure they're up to date and complete.

Conclusion

Backing up and restoring your computer files might seem daunting, but it's a necessary step in protecting your digital life. By choosing the right backup solution and following the steps outlined in this guide, you can safeguard your data against loss, ensuring peace of mind and the security of your digital information.

Essential Tips for Accelerating Your Computer's Performance

Introduction:

Is your computer feeling sluggish and unresponsive? Don't let slow performance hinder your productivity. Fortunately, there are several effective strategies you can employ to speed up your computer and optimize its performance. In this guide, we'll delve into essential tips for accelerating your computer's speed and ensuring a smoother user experience.


Tip 1: Combat Malware and Viruses

Start by conducting a comprehensive scan of your system using trusted antivirus software. Eliminating malware and viruses can alleviate the strain on your computer's resources and improve overall performance.


Tip 2: Streamline Startup Programs

Reduce boot times and enhance performance by disabling unnecessary startup programs. Use the Task Manager (Windows) or System Preferences (Mac) to manage startup applications and prioritize essential ones.


Tip 3: Declutter Your Hard Drive

Free up valuable disk space by removing redundant files and applications. Utilize disk cleanup tools or storage management utilities to tidy up your hard drive and optimize performance.


Tip 4: Optimize File Storage with Disk Defragmentation (Windows Only)

Maximize efficiency by defragmenting your hard drive to organize fragmented files and improve read/write speeds. The built-in Disk Defragmenter tool in Windows can help streamline file storage for enhanced performance.


Tip 5: Consider Hardware Upgrades

Boost your computer's capabilities by upgrading hardware components such as RAM or switching to a solid-state drive (SSD). These upgrades can significantly enhance multitasking capabilities and reduce load times.


Tip 6: Keep Software and Drivers Up to Date

Stay ahead of compatibility issues and security vulnerabilities by regularly updating your operating system, drivers, and essential software. Ensure that your system remains optimized and secure with timely updates.


Tip 7: Fine-Tune Visual Effects Settings

Minimize resource consumption by adjusting unnecessary visual effects and animations in your operating system settings. Streamlining visual effects can help free up system resources and improve overall performance.


Tip 8: Schedule Regular System Restarts

Refresh your computer's settings and clear temporary files by scheduling regular system restarts. This simple practice can help maintain peak performance and prevent sluggishness over time.


Conclusion:

By implementing these essential tips, you can revitalize your computer's performance and enjoy a more responsive computing experience. Stay proactive in optimizing your system's performance to maximize productivity and efficiency. With these strategies, you'll be able to unlock the full potential of your computer and tackle tasks with ease.

How to Speed Up a Slow Computer: Tips and Tricks

Introduction:

Is your computer running frustratingly slow, making simple tasks feel like a chore? A sluggish computer can be incredibly frustrating and can hinder your productivity. Fortunately, there are several steps you can take to speed up your computer and improve its performance. In this guide, we'll explore some effective tips and tricks to help you breathe new life into your slow computer.


Step 1: Check for Malware and Viruses

Malware and viruses can significantly impact your computer's performance. Perform a thorough scan of your system using reputable antivirus software to detect and remove any malicious programs that may be slowing down your computer.


Step 2: Disable Startup Programs

Many programs automatically launch at startup, causing your computer to take longer to boot up and slowing down overall performance. Disable unnecessary startup programs using the Task Manager (Windows) or System Preferences (Mac) to improve boot times and free up system resources.


Step 3: Clean Up Your Hard Drive

A cluttered hard drive can slow down your computer's performance. Delete unnecessary files, such as temporary files, old downloads, and unused applications, to free up disk space and improve performance. Consider using disk cleanup tools or storage management utilities to automate the process.


Step 4: Defragment Your Hard Drive (Windows Only)

Over time, files on your hard drive can become fragmented, leading to slower read and write speeds. Use the built-in Disk Defragmenter tool in Windows to defragment your hard drive and optimize file storage for improved performance.


Step 5: Upgrade Your Hardware

If your computer is still slow despite following the previous steps, it may be time to consider upgrading your hardware. Upgrading your RAM (Random Access Memory) can help improve multitasking capabilities, while upgrading to a solid-state drive (SSD) can significantly boost overall performance and reduce load times.


Step 6: Update Software and Drivers

Outdated software and drivers can cause compatibility issues and hinder performance. Make sure to regularly update your operating system, drivers, and essential software to ensure optimal performance and security.


Step 7: Adjust Visual Effects Settings

Operating system visual effects can consume valuable system resources and slow down your computer. Disable unnecessary visual effects and animations in your operating system settings to free up resources and improve performance.


Step 8: Restart Your Computer Regularly

Restarting your computer can help clear temporary files, close unnecessary background processes, and refresh system settings, leading to improved performance. Make it a habit to restart your computer regularly, especially if you notice a decrease in performance.


Conclusion:

By following these tips and tricks, you can effectively speed up your slow computer and enjoy a smoother and more responsive computing experience. Remember to regularly maintain your computer and keep it free from clutter to ensure optimal performance in the long run. With a little effort and attention to detail, you can breathe new life into your sluggish computer and enhance your productivity.Title: How to Speed Up a Slow Computer: Tips and Tricks

How to Protect Your Online Privacy: A Step-by-Step Guide

Introduction:

In today's digital age, protecting your online privacy is more important than ever. With an increasing amount of personal information stored and shared online, it's essential to take proactive steps to safeguard your privacy and security. In this guide, we'll explore practical strategies and tools to help you protect your online privacy effectively.


Step 1: Secure Your Devices

Securing your devices is the first line of defense against potential privacy threats. Here's how to do it:


- Keep your operating system and software up to date to patch security vulnerabilities.

- Enable device encryption to protect your data from unauthorized access.

- Install reputable antivirus and antimalware software to detect and remove threats.


Step 2: Use Strong Passwords

Strong passwords are crucial for protecting your online accounts from unauthorized access. Follow these tips to create strong passwords:


- Use a combination of letters, numbers, and special characters.

- Avoid using easily guessable information such as your name or birthdate.

- Consider using a password manager to generate and store complex passwords securely.


Step 3: Enable Two-Factor Authentication (2FA)

Two-factor authentication adds an extra layer of security to your online accounts by requiring a second form of verification. Here's how to enable 2FA:


- Enable 2FA on your accounts whenever possible, using methods such as SMS codes, authenticator apps, or hardware tokens.

- Store backup codes in a secure location in case you lose access to your primary authentication method.


Step 4: Secure Your Internet Connection

Protecting your internet connection is essential for safeguarding your online privacy. Follow these steps to secure your connection:


- Use a virtual private network (VPN) to encrypt your internet traffic and anonymize your online activities.

- Avoid using public Wi-Fi networks for sensitive tasks, such as online banking or shopping, as they may be vulnerable to security threats.


Step 5: Review Privacy Settings

Reviewing and adjusting privacy settings on your online accounts and devices can help minimize the amount of personal information shared with third parties. Here's how to do it:


- Regularly review privacy settings on social media platforms, web browsers, and other online services.

- Disable location tracking and unnecessary data collection features whenever possible.

- Opt out of targeted advertising and data sharing agreements with third-party companies.


Step 6: Be Mindful of Online Behavior

Practicing good online habits can significantly reduce your risk of privacy breaches. Here are some tips to keep in mind:


- Be cautious when sharing personal information online, especially on social media platforms.

- Avoid clicking on suspicious links or downloading files from unknown sources.

- Educate yourself about common online scams and phishing techniques to avoid falling victim to them.


Conclusion:

By following these steps and implementing best practices for online privacy, you can better protect yourself from privacy threats and enjoy a safer and more secure online experience. Remember that online privacy is an ongoing effort, so stay vigilant and regularly review and update your privacy settings and practices to stay ahead of emerging threats. Your privacy is worth protecting—take the necessary steps to safeguard it.

How to Troubleshoot Common Internet Connection Issues

Introduction:

A stable internet connection is essential for many aspects of our daily lives, from work and communication to entertainment and information. However, internet connection issues can arise unexpectedly, causing frustration and disrupting our productivity. In this guide, we'll explore some of the most common internet connection issues and provide troubleshooting steps to help you get back online quickly.


Issue 1: Slow Internet Speeds

Slow internet speeds can be caused by various factors, including network congestion, outdated equipment, or interference from other devices. Here's how to troubleshoot slow internet speeds:


Step 1: Check Your Internet Speed:

Use an online speed test tool to measure your internet speed. Compare the results with your internet service provider's advertised speeds to determine if you're getting the speeds you're paying for.


Step 2: Restart Your Modem and Router:

Power cycle your modem and router by unplugging them from the power source, waiting for a few minutes, and then plugging them back in. This can help refresh the connection and resolve temporary issues.


Step 3: Reduce Network Congestion:

Limit the number of devices connected to your network simultaneously, especially bandwidth-intensive activities like streaming or gaming. Consider upgrading your internet plan if you frequently experience slow speeds during peak hours.


Issue 2: Intermittent Connection Drops

Intermittent connection drops can be frustrating, especially when they occur frequently during critical tasks. Here's how to troubleshoot intermittent connection drops:


Step 1: Check for Physical Obstructions:

Inspect the area around your modem and router for physical obstructions such as walls, furniture, or appliances that may interfere with the Wi-Fi signal. Reposition your router to a more centralized location for better coverage.


Step 2: Update Firmware and Drivers:

Ensure that your modem, router, and network adapter drivers are up to date. Manufacturers often release firmware updates to address performance issues and security vulnerabilities.


Step 3: Reset Network Settings:

Resetting your network settings can help resolve configuration issues that may be causing intermittent connection drops. Go to your device's network settings and select the option to reset network settings to default.


Issue 3: No Internet Connection

Complete loss of internet connection can be caused by various factors, including ISP outages, faulty equipment, or incorrect network settings. Here's how to troubleshoot a no internet connection issue:


Step 1: Check for ISP Outages:

Visit your internet service provider's website or contact their customer support to check for any reported outages in your area. If there's an outage, you may need to wait for the issue to be resolved by your provider.


Step 2: Verify Physical Connections:

Ensure that all cables connected to your modem and router are securely plugged in. Check for any loose or damaged cables and replace them if necessary.


Step 3: Contact Your ISP:

If you've exhausted all troubleshooting steps and still can't establish an internet connection, contact your internet service provider for further assistance. They may be able to diagnose the issue remotely or send a technician to inspect your equipment.


Conclusion:

By following these troubleshooting steps, you can effectively diagnose and resolve common internet connection issues, ensuring a seamless online experience. Remember to stay patient and methodical during the troubleshooting process, and don't hesitate to seek professional assistance if needed. A stable internet connection is within reach with the right approach to troubleshooting.

How to Set Up a Home Wi-Fi Network: A Comprehensive Guide

Introduction:

In today's digital age, a stable and reliable Wi-Fi network is essential for staying connected to the world around us. Whether you're streaming movies, working from home, or simply browsing the web, a well-configured home Wi-Fi network can make all the difference. In this guide, we'll walk you through the step-by-step process of setting up your own home Wi-Fi network, ensuring a seamless and hassle-free experience for all your connected devices.


Step 1: Choose the Right Equipment

Before diving into the setup process, it's important to ensure you have the right equipment on hand. You'll need a wireless router, preferably one with dual-band capabilities for improved performance, and compatible modem if your ISP requires it. Additionally, consider factors such as coverage area, number of devices, and future scalability when selecting your router.


Step 2: Position Your Router Strategically

The placement of your router can significantly impact the performance and coverage of your Wi-Fi network. Ideally, place your router in a central location within your home, away from obstructions such as walls and electronic devices that may interfere with the signal. Elevating the router to a higher position can also help improve coverage.


Step 3: Connect Your Modem and Router

If you have a separate modem and router, connect them using an Ethernet cable. Ensure that both devices are powered on and properly configured according to the manufacturer's instructions. If your router has a setup wizard, follow the on-screen prompts to establish a connection to your modem.


Step 4: Access the Router's Settings

To configure your Wi-Fi network, you'll need to access your router's settings through a web browser. Consult the user manual or manufacturer's website for instructions on how to log in to your router's admin panel. Typically, you'll enter the router's IP address into the browser's address bar and log in using the default username and password provided.


Step 5: Configure Wi-Fi Settings

Once logged in, navigate to the wireless settings section of the router's admin panel. Here, you can customize your Wi-Fi network name (SSID) and password to your preference. Choose a unique and secure password to prevent unauthorized access to your network. You can also configure additional settings such as network encryption and guest access if desired.


Step 6: Optimize Network Settings

To ensure optimal performance, take advantage of features such as Quality of Service (QoS) and channel selection offered by your router. QoS allows you to prioritize certain types of traffic, such as gaming or video streaming, for a smoother experience. Experiment with different channels to minimize interference and maximize Wi-Fi speed and reliability.


Step 7: Test Your Wi-Fi Network

Once you've configured your Wi-Fi settings, it's time to test your network to ensure everything is working as intended. Connect your devices to the Wi-Fi network using the new SSID and password, and perform speed tests and connectivity checks to verify stability and performance.


Conclusion:

Congratulations! You've successfully set up your own home Wi-Fi network from scratch. By following these steps and implementing best practices for Wi-Fi setup and configuration, you can enjoy a fast, reliable, and secure internet connection for all your devices. If you encounter any issues along the way, don't hesitate to consult the router's user manual or seek assistance from technical support. Happy browsing!

More Tutorials

How to Backup and Restore Your Computer Files: A Comprehensive Guide

In today's digital age, data is everything. From precious family photos to important work documents, losing these files can be a disaste...