Building Your Own Gaming PC: A Step-by-Step Guide

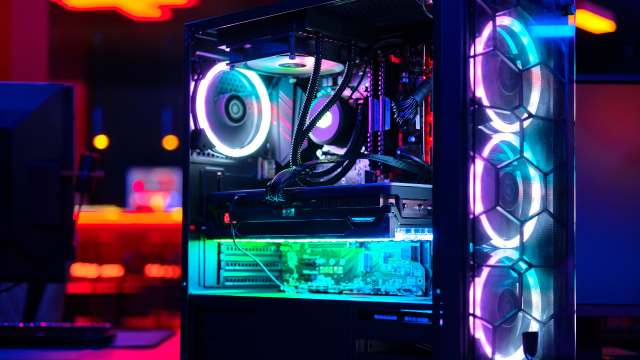
Are you ready to take your gaming experience to the next level? Building your own gaming PC can be a rewarding and exhilarating experience, allowing you to customize every aspect of your rig to suit your preferences and budget. In this guide, we'll walk you through the process of building your own gaming PC, from selecting components to assembling the hardware and getting everything up and running.


Step 1: Planning Your Build

Before you start shopping for components, it's essential to plan your build carefully. Consider factors such as your budget, desired performance level, and specific gaming needs. Research different components, including the CPU, GPU, RAM, storage, motherboard, and power supply, to ensure compatibility and optimal performance.


Step 2: Selecting Components

Once you've outlined your build plan, it's time to start selecting components. Look for high-quality components from reputable manufacturers that offer the performance and features you need. Compare prices from different retailers to find the best deals, and consider factors such as warranty coverage and customer reviews when making your selections.


Step 3: Assembling the Hardware

With all your components in hand, it's time to roll up your sleeves and start assembling your gaming PC. Follow these general steps:


  1. Install the CPU onto the motherboard, ensuring proper alignment and applying thermal paste if necessary.
  2. Install the RAM modules into the appropriate slots on the motherboard, following the manufacturer's instructions.
  3. Install the motherboard into the case, securing it with screws and ensuring proper cable management.
  4. Install the GPU into the appropriate PCIe slot on the motherboard and secure it with screws.
  5. Install storage drives (SSD/HDD) and connect them to the motherboard using SATA cables.
  6. Install the power supply unit (PSU) into the case and connect it to the motherboard, GPU, and other components using appropriate power cables.
  7. Connect case fans, USB ports, audio jacks, and other peripherals to the motherboard as needed.
  8. Double-check all connections and ensure everything is securely in place.


Step 4: Installing Drivers and Software

Once your hardware is assembled, it's time to power on your gaming PC and install drivers and software. Install the operating system of your choice (e.g., Windows, Linux) onto your storage drive and follow the on-screen instructions to complete the installation. Then, install drivers for your motherboard, GPU, and other components from the manufacturer's website to ensure optimal performance and compatibility.


Step 5: Testing and Optimization

With your gaming PC up and running, it's time to put it through its paces and ensure everything is working correctly. Run benchmark tests to gauge performance levels and tweak settings as needed to optimize performance. Monitor temperatures and system stability to ensure everything is running smoothly, and address any issues that arise promptly.


Conclusion

Building your own gaming PC is a rewarding and empowering experience that allows you to create a customized gaming rig tailored to your preferences and needs. By following this step-by-step guide and exercising caution and attention to detail, you can build a high-performance gaming PC that will provide countless hours of gaming enjoyment for years to come. So, roll up your sleeves, dive in, and happy gaming!

Simplifying Security: A Beginner's Guide to Using a Password Manager

In today's digital age, where we juggle multiple online accounts across various platforms, ensuring the security of our passwords has become more critical than ever. Yet, the complexity of creating and managing unique passwords for each account can be overwhelming. This is where password managers come to the rescue.


What is a Password Manager?

A password manager is a software application designed to securely store and manage passwords for various online accounts. It acts as a digital vault, encrypting your passwords and providing easy access to them whenever needed.


Why Use a Password Manager?

1. Enhanced Security: Password managers generate strong, unique passwords for each of your accounts, reducing the risk of unauthorized access due to password reuse or weak passwords.

2. Convenience: With a password manager, you only need to remember one master password to access all your stored passwords, making it easier to manage multiple accounts.

3. Cross-Platform Syncing: Many password managers offer synchronization across different devices and platforms, ensuring your passwords are accessible wherever you go.

4. Encrypted Storage: Password managers use advanced encryption algorithms to safeguard your password data, protecting it from unauthorized access.


How to Get Started with a Password Manager:

1. Choose a Password Manager: There are several password managers available, including LastPass, Dashlane, and Bitwarden. Research and select one that meets your security requirements and preferences.

2. Create a Master Password: Your master password is the key to unlocking your password manager vault. Choose a strong, memorable passphrase that is unique and not easily guessable.

3. Install the Password Manager: Download and install the chosen password manager on your device(s) and follow the setup instructions to create your account.

4. Add Your Accounts: Once set up, start adding your online accounts to the password manager. You can manually enter each account's login credentials or import them from your browser.

5. Generate Strong Passwords: When creating new accounts or updating existing passwords, use the password manager's built-in password generator to create strong, random passwords.

6. Organize and Secure Your Vault: Organize your passwords into categories or folders within the password manager for easier access. Ensure that your master password is strong and known only to you.


Best Practices for Using a Password Manager:

- Regularly update your master password and ensure it is unique and not used elsewhere.

- Enable two-factor authentication (2FA) for an additional layer of security.

- Periodically review and update your stored passwords, especially for critical accounts.

- Be cautious when accessing your password manager on shared or public devices, and always log out when done.


By adopting a password manager, you can simplify password management while enhancing your online security. Invest some time upfront to set it up correctly, and enjoy the peace of mind knowing that your accounts are better protected.

Mastering Cloud Storage: A Guide to Using Dropbox, Google Drive, and More Effectively

In today's digital age, cloud storage has become an indispensable tool for individuals and businesses alike. Services like Dropbox, Google Drive, and others offer convenient ways to store, access, and share files from anywhere with an internet connection. However, many users may not be utilizing these platforms to their full potential. In this guide, we'll explore how to make the most out of cloud storage services for your personal and professional needs.


Understanding Cloud Storage


Cloud storage allows you to store your files securely on remote servers, accessible via the internet. This eliminates the need for physical storage devices and provides the flexibility to access your files from multiple devices.


 Choosing the Right Cloud Storage Service


Before diving in, it's essential to choose a cloud storage service that suits your requirements. Here's a brief overview of two popular options:


 Dropbox:

- Known for its user-friendly interface and seamless file syncing across devices.

- Offers a free basic plan with limited storage and paid plans for additional space and features.


 Google Drive:

- Integrated with Google Workspace (formerly G Suite), providing collaborative features like real-time editing and commenting on documents.

- Comes with a generous amount of free storage and options to upgrade for more space.


 Getting Started with Cloud Storage


1. Sign Up: Create an account with your chosen cloud storage provider.


2. Install the App: Download and install the desktop and mobile apps for easy access to your files.


3. Upload Files: Start by uploading your files to the cloud storage platform. You can drag and drop files directly into the web interface or use the desktop app to sync files from your computer.


 Organizing Your Files


Effective file organization is key to maximizing productivity and efficiency. Here are some tips:


- Create Folders: Organize your files into folders based on categories or projects.

- Use Tags and Labels: Assign tags or labels to files for easier searching and sorting.

- Share Folders: Collaborate with others by sharing entire folders, allowing multiple users to access and edit files.


 Collaborating with Others


One of the biggest advantages of cloud storage is its collaborative features. Here's how to make the most of them:


- Real-Time Editing: Work on documents simultaneously with others, seeing changes in real-time.

- Commenting and Feedback: Leave comments on files to provide feedback or ask questions.

- Version History: Access previous versions of files and revert to earlier edits if needed.


 Security and Privacy


While cloud storage offers convenience, it's essential to prioritize security and privacy. Here are some best practices:


- Enable Two-Factor Authentication: Add an extra layer of security to your account.

- Encrypt Sensitive Files: Use encryption tools to protect sensitive data before uploading it to the cloud.

- Review Sharing Settings: Regularly review and update sharing settings to control who has access to your files.


 Conclusion


Cloud storage services like Dropbox and Google Drive offer powerful tools for storing, organizing, and sharing your files. By following the tips and best practices outlined in this guide, you can make the most out of these platforms and streamline your digital workflow.

In this format, the content is structured as a comprehensive guide, providing an overview, step-by-step instructions, tips, and best practices for effectively using cloud storage services.

Personalize Your Desktop: A Guide to Customizing Themes and Icons

Introduction

Your desktop is the digital space where you spend a significant amount of time each day. Making it visually appealing and organized can enhance your productivity and overall computing experience. In this guide, we'll explore how to personalize your desktop by customizing themes and icons, allowing you to create a workspace that reflects your personality and preferences.


Step 1: Choosing a Theme

The first step in customizing your desktop is selecting a theme that suits your style. Here's how to do it:

1. Right-click on an empty area of your desktop and select "Personalize" from the dropdown menu.

2. In the Personalization settings window, navigate to the "Themes" tab.

3. Browse through the available themes or click on "Get more themes online" to explore additional options.

4. Once you've found a theme you like, click on it to apply it to your desktop.


Step 2: Customizing Theme Settings

After applying a theme, you can further customize its settings to match your preferences:

1. Return to the Personalization settings window and click on the "Theme settings" link under the selected theme.

2. Here, you can adjust various aspects of the theme, such as the background image, color scheme, sounds, and mouse pointers.

3. Experiment with different settings until you achieve the desired look and feel for your desktop.


Step 3: Changing Desktop Icons

Next, let's spruce up your desktop by changing the default icons for your files, folders, and shortcuts:

1. Right-click on the desktop and select "Personalize" once again.

2. This time, choose the "Change desktop icons" option from the left sidebar.

3. In the Desktop Icon Settings window, you'll see a list of default icons such as Computer, Network, and Recycle Bin.

4. To change an icon, select it from the list and click on the "Change Icon" button.

5. Browse through the available icon options or click "Browse" to select an icon file from your computer.

6. Once you've chosen a new icon, click "OK" to apply the changes.

7. Repeat this process for each icon you wish to customize.


Step 4: Organizing Your Desktop

With your new theme and customized icons in place, it's time to organize your desktop for maximum efficiency:

1. Arrange your icons in a way that makes sense to you, whether it's by category, frequency of use, or another system.

2. Consider creating folders to group related files and shortcuts together, keeping your desktop clutter-free.

3. Take advantage of features like desktop shortcuts and pinned items to quickly access frequently used programs and files.


Conclusion:

By following these steps, you can transform your desktop into a personalized workspace that reflects your unique style and enhances your computing experience. Experiment with different themes, icons, and organizational strategies until you find the perfect setup that suits your needs. With a bit of creativity and customization, your desktop can become not only a functional tool but also a source of inspiration and motivation.

More Tutorials

How to Backup and Restore Your Computer Files: A Comprehensive Guide

In today's digital age, data is everything. From precious family photos to important work documents, losing these files can be a disaste...